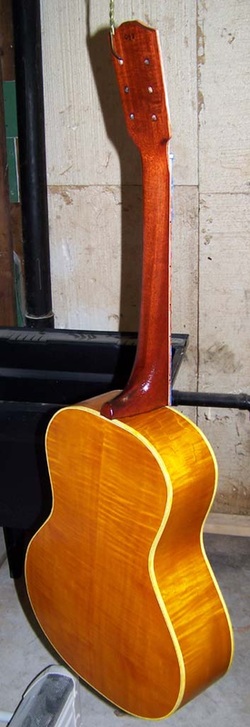
Finished scraping the bindings this morning so thought I'd snap a couple quick pics before I move on to clear coats. I'm pretty happy with it!

|
Finished scraping the bindings this morning so thought I'd snap a couple quick pics before I move on to clear coats. I'm pretty happy with it!
0 Comments
After applying a few coats of amber dye to the body of the guitar, I started mixing up dye for the neck and sunburst. I was going for a reddish brown and the neck came out pretty much how I wanted. 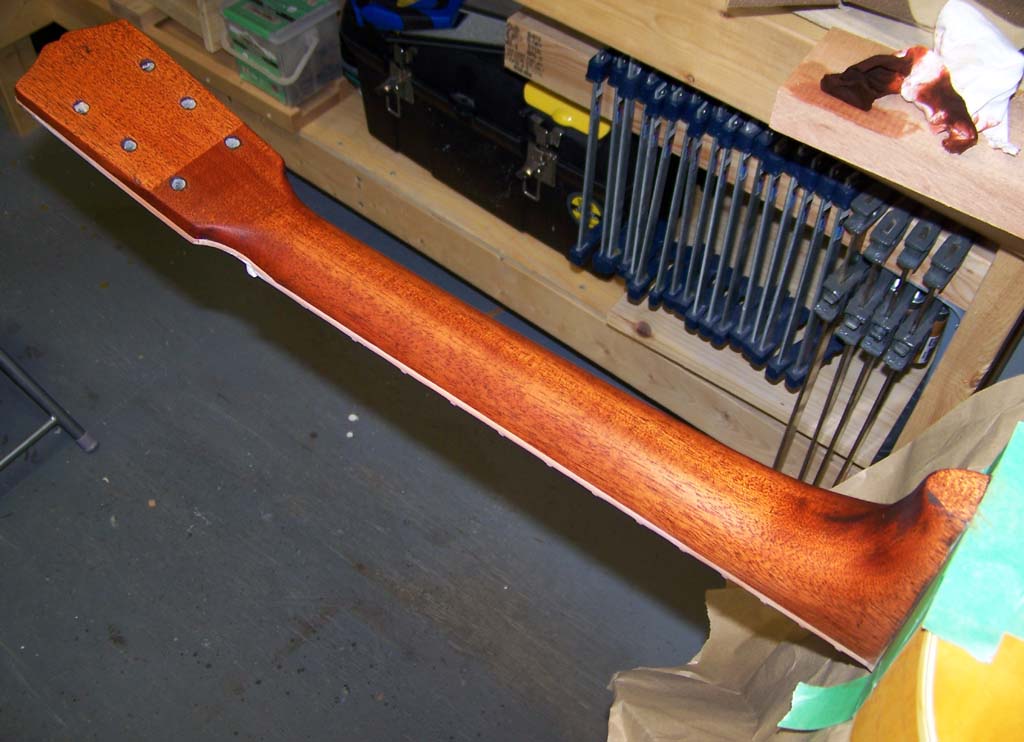
 I am once again using water-based lacquer, but for this build I decided to also use Target EM1000 sanding sealer. I sprayed 2 light coats on the entire guitar to seal the neck and amber colour. 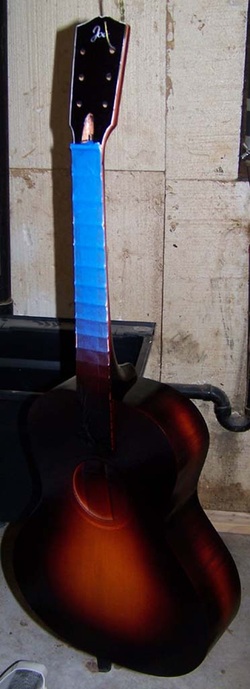 I have read that some guys use the sanding sealer to spray colour, so that's what I did. I started off spraying the colour lightly, and eventually sprayed 3 progressively darker coats until I got a nice burst. The very last time I sprayed I mixed in a little bit of black pigment and used my airbrush just around the edges. I have a couple imperfections around the edges of the binding but I think this will cover them. 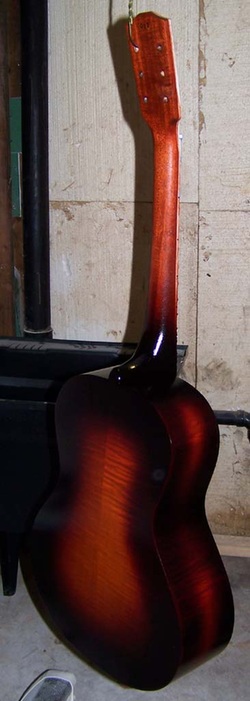 I still have to clean up a little overspray and scrape the bindings before I move on to clear coats. So far I am pretty happy with it though, especially considering this is my first time attempting a sunburst! Today I finished all the final sanding, so on to the finishing process! First coat of amber dye for my sunburst! 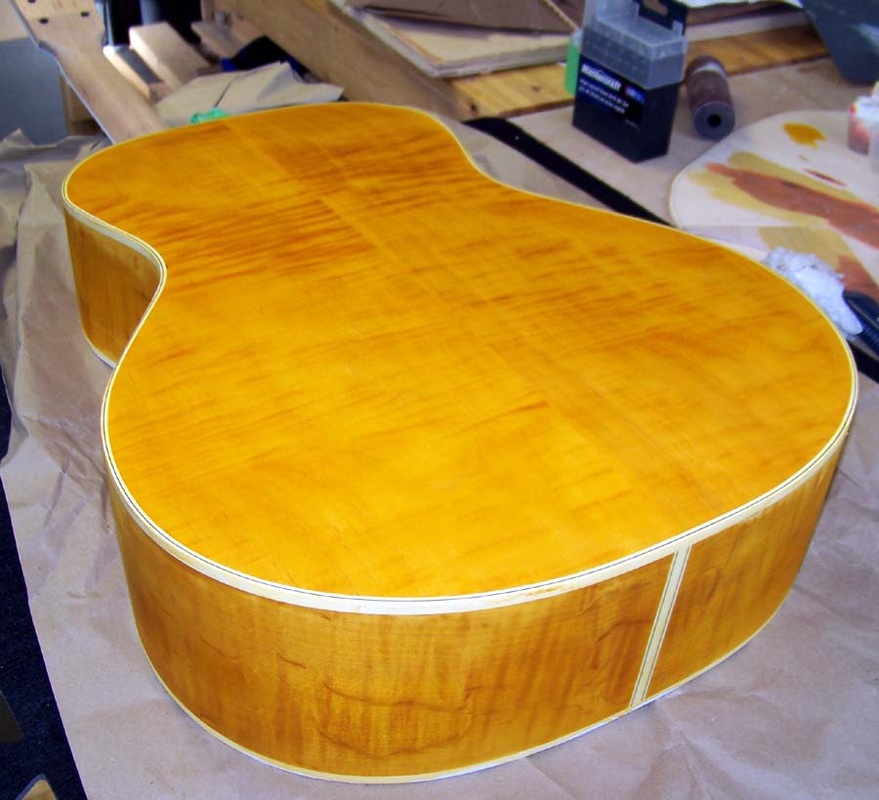
Just a little more finish sanding and I'll be ready for finishing. Just trying to decide on what colour to finish it. I want to do it in a sunburst, but what kind.... hmmmm.... thinking of either a tobacco or sienna sunburst..... or maybe cherry.... dec 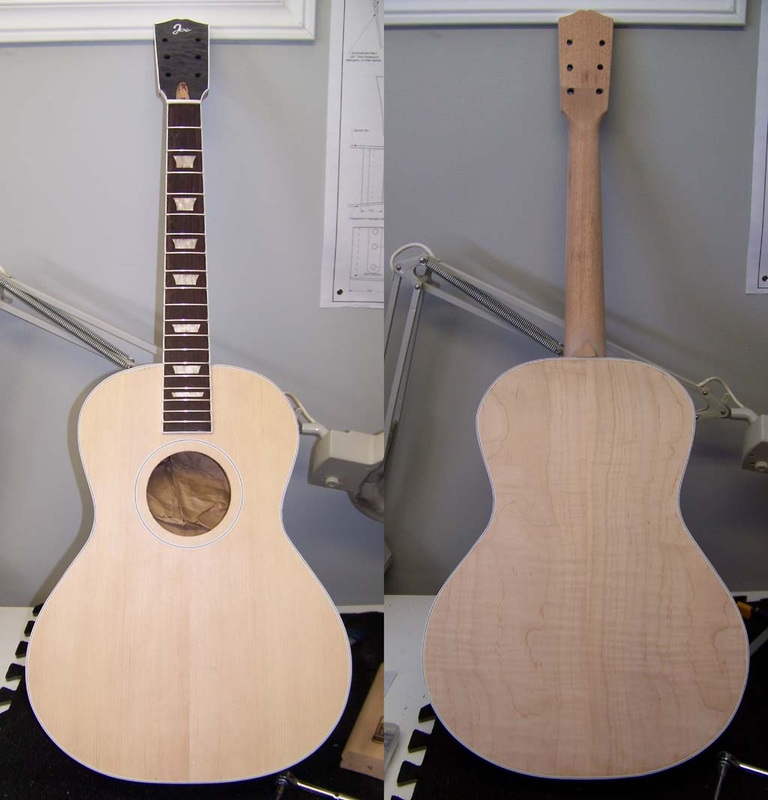
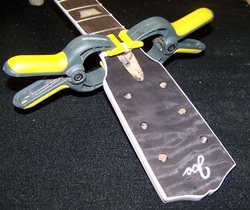 Its been a few days so I thought I'd write a quick update. I finished carving the neck and bound the headstock. This was a little tricky because I had to cut some of the channels by hand, but it turned out decent for a first attempt. Also did the inlay. I dyed the quilted maple headstock veneer black and glued in a bone nut.
I have begun sanding the body. I;ll have to make sure the neck fit hasn't changed any due to my sanding, and then it will be time to start dying and finishing! Tuner holes are done, headstock shaped, and I've begun shaping the neck. I did some shaping yesterday but its still too big. I am trying to model it somewhat after a very comfortable 1950's ES-125 I have access to. Its not quite there yet but hopefully another day's worth of work and the neck should be fine. Also thinking of adding some headstock binding as well, we'll see! 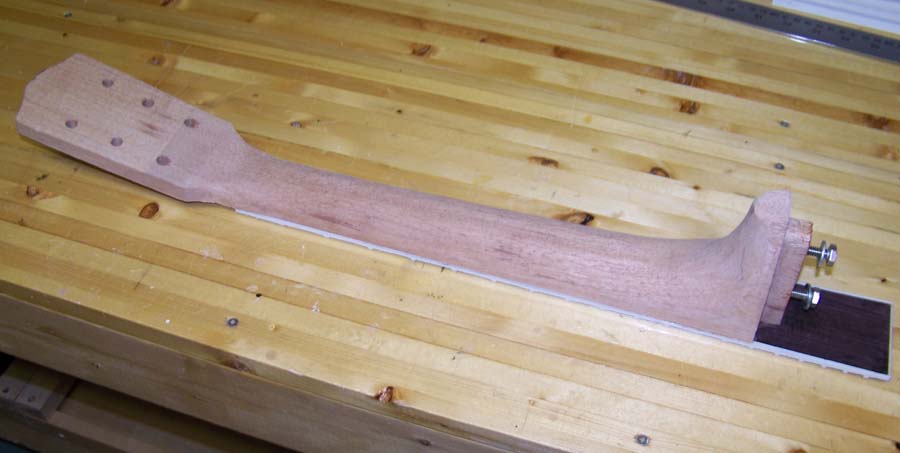
Today I finished setting the neck angle and centering the neck. I installed the trussrod, using some caulking to cushion the rod in the channel. Then I glued the fretboard to the neck. Next step will be to shape the neck and headstock 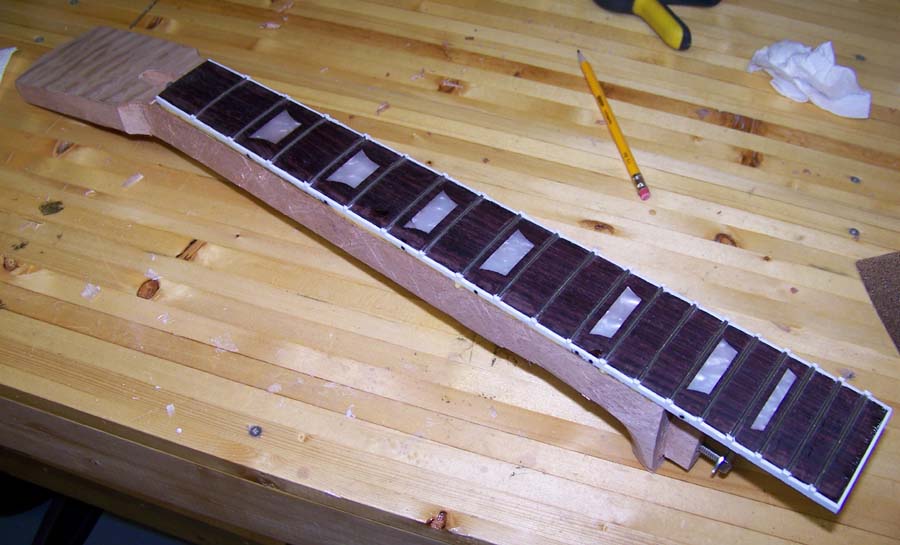
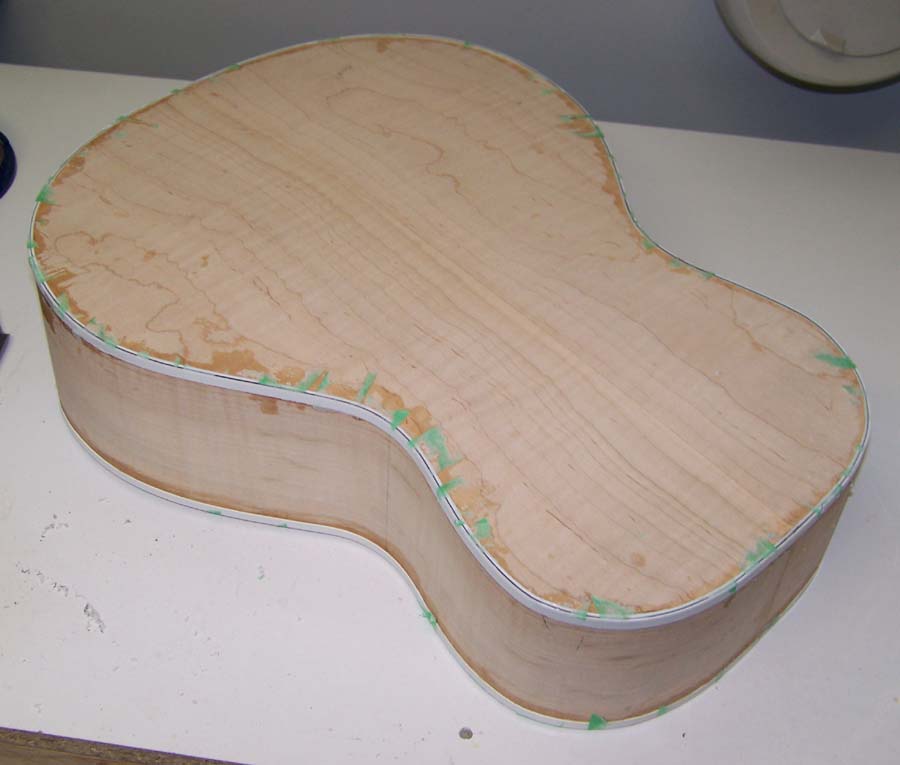
So in the last couple weeks I've been busy with some different projects around the house but I have managed to begin fitting the neck to the body. I first installed the mounting hardware in the end of the neck (I'm doing a bolt on neck joint on this guitar again) and then started carving the tenon to ft the body. I still have have a lot to do to get it to fit nicely but couldn't resist taking a quick pic. You'll also notice I glued a quilted maple veneer to the face of the headstock. I think it will look great when finished! 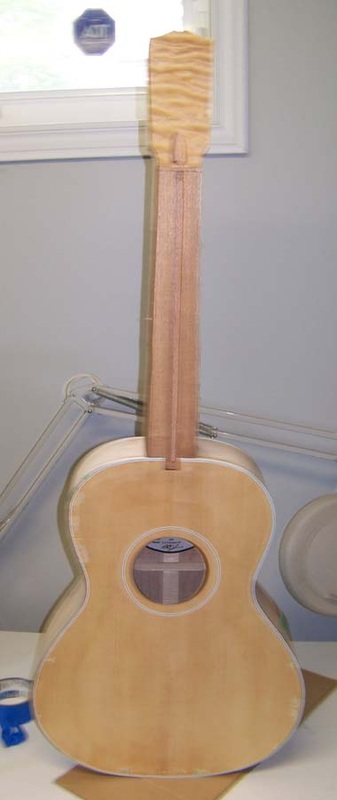 This is the second L-O I'm working on. The first was mahogany back and sides and finished in black. This one will be lightly figured maple back and sides, and I plan to dress it up a little more. I won't detail this build as much as my last, just the stuff that is different on this build. 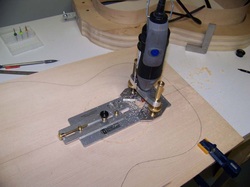 I got some new Stewmac tools lately, so I enjoyed trying out this pair of tools! I used a circle cutting jig and router attachment with my Dremel to route a channel for a simple rosette.  I sealed the channel and top with shellac, then carefully inlaid a simple white/black/white rosette. I used thin CA glue to glue it in place. After I scraped it level with the top, I used the circle cutter again to cut out the sound hole. 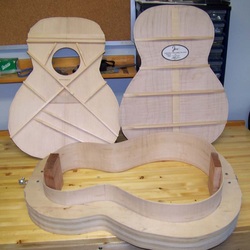 The only difference on the bracing for this guitar is instead of a fabric patch over the X-brace joint, I glued in a wood patch. This picture was prior to shaping the top bracing. I also purchased kerfing this time. Its too time consuming to make it myself and I gives me a cleaner look then homemade. I got the box closed, trimmed, and binding ledges cut. 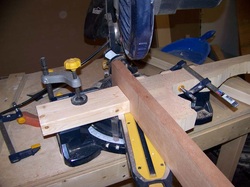 The neck is made of Spanish cedar, scarf joint headstock and stacked heel. I fashioned a "jig" and cut the joint on a miter saw. It turned out nearly perfect and only needed minor touch up with a block plane. 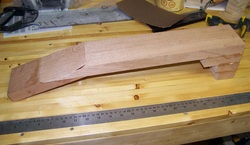 Here's the neck blank all glued together. 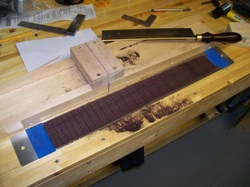 To make a more accurate fretboard, I got a fret slotting template from Stewmac and made my own miter box out of maple. 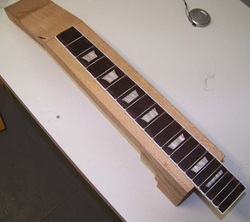 I inlaid the rosewood board with LP style inlays. I pressed in the frets, filed them flush with the board, and bound the board LP style with the plastic nibs on the ends of each fret. 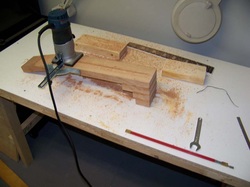 Using my new Colt router and straight edge attachment, I routed the truss rod slot. In this guitar I am using a Stewmac Hotrod. 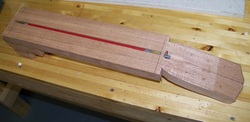 I roughed out the headstock, tuner holes, and truss rod access. Below are pictures of the white/black/white bound body. Still have to clean up all the tape though! 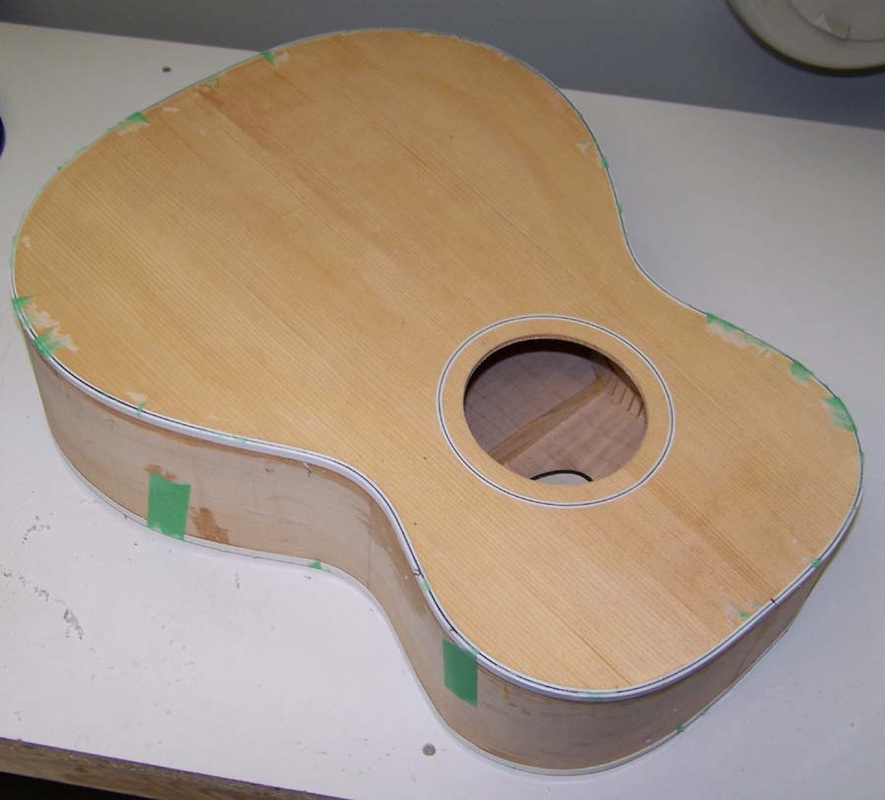
|
Archives
November 2013
Categories |
 RSS Feed
